StarryCamera2
康行 Nagasima

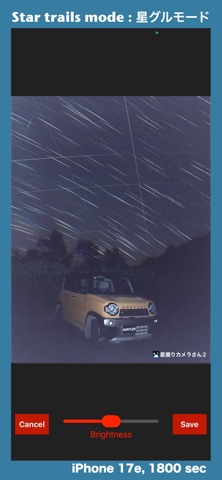
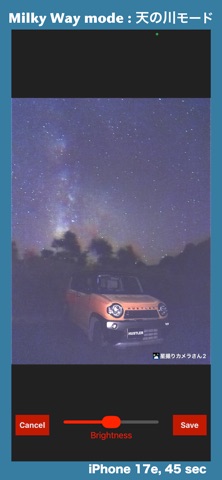
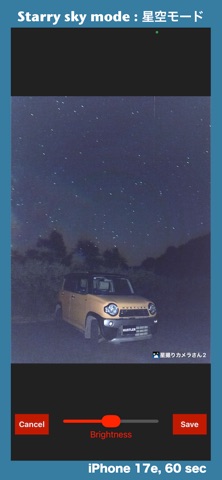
This camera app is designed to help you take beautiful photos of the stars with your iPhone. Why not try shooting star trails with your iPhone? ### How to Use 1. Go to a location with low temperatures where stars are clearly visible. 2. Secure your iPhone on a tripod or similar mount (this is the most important step). 3. Select a shooting mode. 4. Adjust brightness using shutter speed and ISO sensitivity. 5. Press the shutter button. ### Mode Features Starry Sky: Makes bright stars stand out; captures the scene close to how the naked eye sees it. Star Trails: For capturing star trail photos (shooting for 30 minutes creates a distinct star trail effect). Milky Way: For capturing the Milky Way and fine stars with sharp clarity. Night View: For when you want no processing; produces low-noise images. Lighten Composite: Uses lighten compositing (ideal for fireflies, fireworks, light trails, etc.). ### Fine-Tuning Focus 1. Position a bright star (such as a first- or second-magnitude star) in the center of the screen. 2. Press the focus button to zoom in; use the slider for coarse adjustment, then use the stepper controls to find the position where the star appears smallest. 3. If it is difficult to tell, try shooting with different focus positions and compare the results. ### About Star Trail Mode Unlike other modes, Star Trail Mode and Lighten Composite Mode do not allow brightness adjustments via shutter speed; please adjust the brightness using ISO sensitivity instead. To minimize errors, start with a 120-second test shot to adjust settings like ISO sensitivity before proceeding to the actual 1,800- or 3,600-second exposure. The "Starry Sky" mode is suitable for urban astrophotography, as it allows you to capture images in locations where long exposures might otherwise result in an overexposed, washed-out white image. Including statues or monuments in the frame can create impressive, visually striking photos. Using flimsy holders or tripods can cause the star trails to blur, so I recommend using sturdy, high-quality equipment. In "Star Trail" mode, the background is smoothed out via "Lighten Composite" (stacking) processing; this improves the visual quality, even on cameras with small, noise-prone sensors like those found in iPhones. Including the North Star enhances the swirling effect but results in shorter trails. Pointing the camera east (or elsewhere) eliminates the swirling look but produces longer trails. Choose whichever style you prefer. During a meteor shower, a one-hour star trail exposure might capture two or three shooting stars. For "Star Trail" mode, I recommend setting the light duration to "Middle Only." ### About Watermarks The default setting displays the app's name; please customize this with your handle or account name to protect your copyright. ### Recommended Method for Star Trail Photos with Cars 1. Start by selecting the ISO setting one step below the maximum. 2. In the settings, select "Middle Only" for the light duration. 3. Set the light intensity to "Medium" on the shooting screen. 4. Set the shutter speed to 120 seconds and take a few test shots to adjust the ISO sensitivity and light intensity. If the entire image is too bright, lower the ISO sensitivity; if it is too dark, raise it. If the car illuminated by the light is too bright, lower the light intensity; if it is too dark, raise it. 5. Once the ISO and light settings are finalized, set the shutter speed to 1800 seconds for the actual shot. Initially, you can leave the focus at the default setting of 0.0; however, once you get the hang of it, pressing the focus button to ensure precise focusing will result in sharper star trails and higher-quality photos.
Screenshots